It Can Help You
Drum Installation
You’ve just bought new or second-hand drums and when you go back home, a question arises: where to start?
This article will prevent you from making beginner’s errors, help you save time and not damage your “little jewel”. Find below anything you need to know about drum installation.
Preparation
Choosing the room is very important, drums are very bulky and especially noisy. Keep in mind that when you start playing, the purpose is to spend as much time as possible to practice, to play with friends. You must feel free in this room, free to work as much as you like without bothering all the family and especially without any disruptive elements that could distract you. Therefore, avoid the living-room!! The ideal is a cellar, a garage or a bedroom. Once you’ve found the ideal room, the drum kit must be placed in a strategic place to avoid having to move it each time you want to play. Also think of the place of your music stand. Placed against a wall, the drum kit will take up less space but it is quite boring unless you display pictures of your favorite drummers.
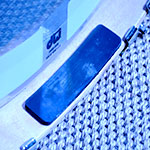
Before installing the kit, lay a piece of carpet, a rug approximately 2m x 2m on the ground. The bass drum is equipped with pikes that may damage the ground and accessories such as the bass-drum pedal or the high-hat stand could leave some grease traces on the ground. So in order to avoid damaging it and ensure drum kit stability, lay a piece of carpet.
Installation
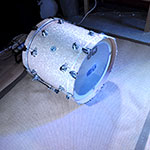
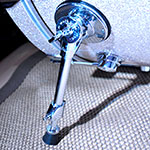
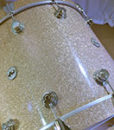
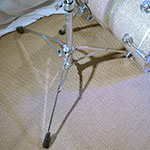
Place the bass drum at the centre of the carpet, parallel to the edge. On each side, you just have to unscrew the stands enough to rotate them forward. On most drums, the ideal position is indicated. Once you’ve found the right inclination, screw them back on. You can make the stands a bit longer so that the bass-drum front is slightly raised just enough for a finger. They must be the same size to ensure bass-drum stability. Then, at the tip of the stands you’ll have the choice between some rubber or a pike. To avoid slipping, go for a pike (hence the importance of the carpet).
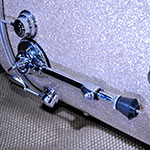
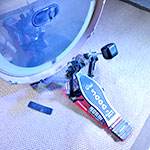
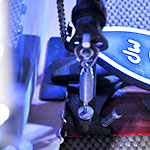
The bass-drum pedal must be hooked to the hooping of your bass drum. It is fitted with a system of pliers to be screwed. It is important to put something between the hooping and the pedal in order not to damage the hooping but also to securely hold the pedal. A piece of rubber or cardboard will make it out. Place the pedal at the center of the bass drum so as it is perfectly parallel to the ground and also to ensure good stabililty.
In order to get a bass-drum sound which doesn’t resonate too much, you can put a cushion or a blanket inside which touches the kick drumhead and the resonant drumhead.
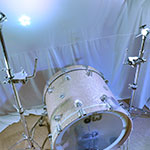
In our case, the bass drum is not pierced, so the toms will have to be fixed on the cymbal stands with the stands provided for the purpose. Therefore, the stand base must be widely opened in order to support the tom weight. A stand with boom would be better suited in this set up to enable the cymbals to be comfortably installed. If the bass drum is pierced, you’ll be able to insert a tom stand arm.
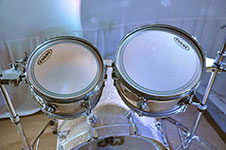
For a right-handed drummer, the toms will be placed from left to right, from treble to bass. For left-handers, it will be the reverse. Position the toms so they have the same height and the same inclination (slightly toward you), as close as possible to each other but without any contact. Also avoid them to touch the bass drum.
Install the floor tom. It’ll rest on three stands or suspended, in the latter case, the cymbal stand base should be wide-opened for the tom to be stable. You must slightly tilt it toward you. To set its height, you must first install the snare drum.

Unfold the snare stand. Do not open the tripod too much so as to leave room for the two pedals around it. Place the snare drum in the basket, secure it so that it is not too loose inside. The snare drum is equipped with a trigger that you can put on the right or on the left as you want.


Once you’ve set the snare drum location and height, you can adjust the floor tom height trying to properly align it. Place the seat so as to have the snare drum between your legs (see the article on the drum position).
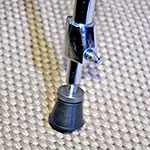
For the high hat stand, unfold the tripod. The stand base must be in contact with the ground.
It is often provided with screws on which the stand rests to prevent it from slipping.
On the tube, there is a plastic piece which you put an iron washer on then some foam and lastly the high hat cymbal called “bottom”. The small screw underneath will be used later to set the inclination of the lower cymbal. The stand is to be installed on the left, the cymbals will extend beyond the snare drum.

The high hat clutch will enable the top cymbal to be hooked to the stand rod. Starting from the top, it is composed of the main part with the butterfly nut, 2 nuts used as locknuts, 2 foam pieces and a nut to close the system up. The cymbal will be placed between the 2 foam pieces. A cymbal must never be in contact with the metal as it could get damaged and rattle which might be annoying during a recording session.


Installation of the cymbals. For this example, we’ll use one crash and one ride. The crash must be placed between the high hat stand and the high tom. The ride should be placed on the right above the medium tom and the floor tom. On the same principle as the high hat cluch, the cymbals should be placed on their stands and between the two foam pieces. Never use pliers to tighten the butterfly screws as it ruins the screw threads and in the long run, they’ll be unusable. Always do it manually, it’ll be sufficient.
Well, that is the setting of standard drums that you’ll find in music stores.